
Installing Windows VM and passthrough GPU (part 2 of Debian as type 1 hypervisor)
05 Aug 2020Now we are ready to install our first virtual machine. But first we need something to install from. You can download the ISO directly from Microsoft these days, just make sure you have a valid license.
Then we need virtio drivers, direct link to virtio-win here or download it directly from host using wget
# wget https://fedorapeople.org/groups/virt/virtio-win/direct-downloads/stable-virtio/virtio-win_amd64.vfd
Read more about virtio at Fedora Docs I don’t like the way libvirt organize all files for a virtual machine. I want everything for a certain machine in one folder. Not all XML machine description files in one place and virtual drive files in another place. So I just created a folder in my root named kvm and then I put all the files for each VM in a subfolder.
Lets create a folder for the first VM
# mkdir -p /kvm/windows
this folder is going to contain both the XML file and the qcow2 virtual harddrive. I know libvirt is going to create it’s own XML files, I just ignore them and use my own.
First create a virtual drive image file (can be auto created with virt-install command, I just want more control) I create a small one for my C drive, and then later I create a bigger one for my D drive for games and stuff.
qemu-img create -f qcow2 /kvm/windows/c_drive.qcow2 30G
Note that the -f qcow2 will use the copy-on-write file format, so the drive image file will only use as much space as you actually use in the virtual machine.
now we are ready to start the Windows install, Not that you may need to change windows ISO path and the /kvm/iso/virtio-win-0.1.173_amd64.vfd to the path and version of your files.
virt-install \
   --name=windows \
   --cpu host-passthrough --hvm --features kvm_hidden=on \
   --ram=8192 \
   --vcpus=4 \
   --os-type=windows --os-variant win10 \
   --boot uefi --machine q35 \
   --disk path=/kvm/windows/c_drive.qcow2,bus=virtio \
   --cdrom /kvm/iso/Windows10.iso \
   --disk path=/kvm/iso/virtio-win-0.1.173_amd64.vfd,device=floppy \
   --graphics vnc,listen=0.0.0.0 --noautoconsole
Note that this command will use VNC because there is no Xorg installed, I used a laptop to connect to VNC for the Windows installation part. Default port for VNC is 5900. You can change port by using --graphics vnc,listen=0.0.0.0,port=XXXX where XXXX is your desired port number.
Because Windows ISO wants you to press a key at boot, within like 5 seconds or something, you may end up in the UEFI shell instead because it failed to boot
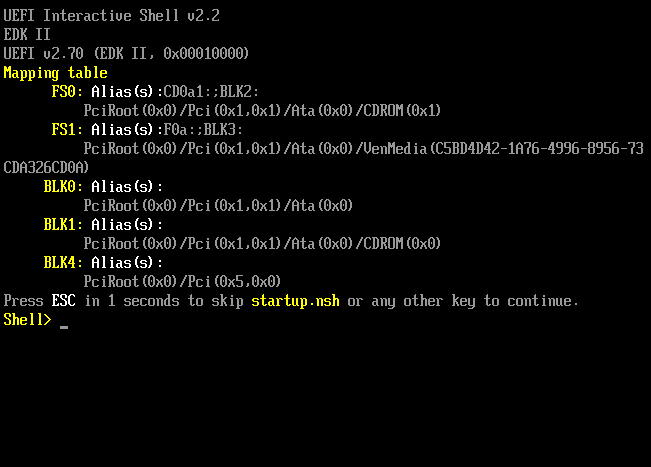
exit and you will get to the UEFI config screen
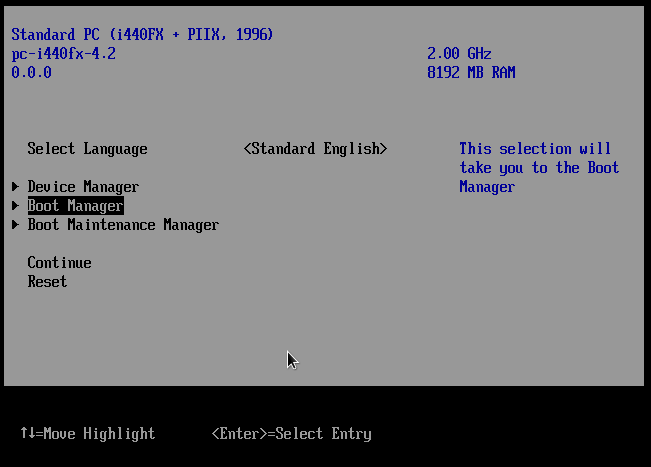
Boot Manager
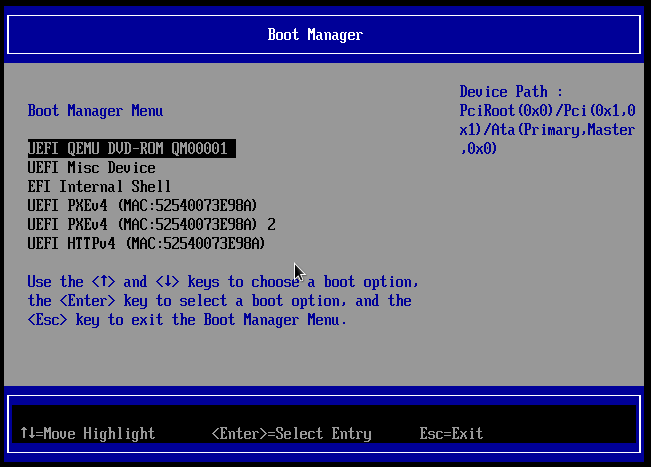
Don’t run of when you get to the point where you will choose harddrive to install to. There is none because Windows does not have drivers for virtio, thats why we have the virtio-win floppy disk attached to our machine. Just browse and load the drivers. I install both virtio Network and virtio SCSI(?) drivers at this point (need to open and select drivers twice AFAIK).
During install when the Windows installer reboots the machine it does not always reboot correctly, most of the times it just shutdowns. It is some settings for libvirt, no need to solve this now. Just restart the virtual machine with the command virsh start windows (replace windows with your VM’s name) and it will continue the install as if it was a normal reboot.
Before we shutdown our newly created virtual Windows machine, install a VNC server of choice. Because we will disable libvirts built in VNC support and Remote Desktop does not always play nice when we try to pass through a GPU (it didn’t work for me). I use TightVNC as server on my Windows machine.
If you are planning to use secondary monitor, keyboard and mouse you can skip VNC server.
After Install
After Windows have been installed, shutdown the virtual machine. Libvirt have created an XML file for the machin, lets extract that one
virsh dumpxml windows > /kvm/windows/windows.xml
With our copy of libvirts XML file, it’s easy to make changes to the virtual hardware for the virtual machine and add passthrough devices.
Lets begin with removing the Windows install ISO and virtio floppy disk from the virtual machine, those are no longer needed.
Find this code (paths depends on the locations of ISO files etc.)
<disk type='file' device='floppy'>
  <driver name='qemu' type='raw'/>
  <source file='/kvm/iso/virtio-win-0.1.173_amd64.vfd'/>
  <target dev='fda' bus='fdc'/>
  <address type='drive' controller='0' bus='0' target='0' unit='0'/>
</disk>
<disk type='file' device='cdrom'>
  <driver name='qemu' type='raw'/>
  <source file='/kvm/iso/Windows10.iso'/>
  <target dev='hda' bus='ide'/>
  <readonly/>
  <address type='drive' controller='0' bus='0' target='0' unit='0'/>
</disk>
I just comment this out using <!-- and --> XML comment tags, like this:
<!--
<disk type='file' device='floppy'>
  <driver name='qemu' type='raw'/>
  <source file='/kvm/iso/virtio-win-0.1.173_amd64.vfd'/>
  <target dev='fda' bus='fdc'/>
  <address type='drive' controller='0' bus='0' target='0' unit='0'/>
</disk>
<disk type='file' device='cdrom'>
  <driver name='qemu' type='raw'/>
  <source file='/kvm/iso/Windows10.iso'/>
  <target dev='hda' bus='ide'/>
  <readonly/>
  <address type='drive' controller='0' bus='0' target='0' unit='0'/>
</disk>
-->
This way it’s easy to just reuse the dumped XML file, but be warned, this is not what is intended (it’s intended to dump a new XML for every change). But I use the same XML file and ignore whatever libvirt do with its own version, this way I can keep my own comments and disable stuff with comment tags and store it in the same folder as my virtual harddrive image.
When the changes have been made to the XML file libvirt must be updated with the changes. To do so run the following command
virsh define /kvm/windows/windows.xml
This will redefine the virtual machine using the changes made in the XML file. Next time the virtual machines start, the Windows install ISO and virtio floppy is no longer present.
GPU Passthrough
Every guide says we need to blacklist nvidia, to do so just add add blacklist nvidia to /etc/modprobe.d/blacklist.conf
# Blacklisted modules
blacklist nvidia
There is no Nvidia drivers installed so I think this is not needed, but I have not tested that theory yet. Guides also says to blacklist nouveau, but I have not blacklisted nouveau (nouveau is used by my GTX1050ti).
Find our graphics card
Running the command lspci on the host will list all PCI devices attached. Each line starts with numbers and colon e.g. 26:00.0 this is the identifier we need to know to be able to passthrough a device. To be able to pass through the device, it has to be in it’s own IOMMU group, to list groups and the devices in each group this script can be used
#!/bin/bash
shopt -s nullglob
for g in /sys/kernel/iommu_groups/*; do
    echo "IOMMU Group ${g##*/}:"
    for d in $g/devices/*; do
        echo -e "\t$(lspci -nns ${d##*/})"
    done;
done;
This script is from Arch WIKI - PCI passthrough via OVMF.
Another important thing, all the sub devices (or what to call them) must be passthrough together, that is the last .X devices of one XX.YY group. This is probibly because the GPU drivers expect them to be there.
For my computer the RTX2060 is identified by 26:00.0
# lspci
...
26:00.0 VGA compatible controller: NVIDIA Corporation TU104 [GeForce RTX 2060] (rev a1)
...
but there is more, if you look closer to the lspci output, or you can filter the output with the lspci -s 26:00 -nn ``command. This will list all devices matching 26:00, in my case I get this:
# lspci -s 26:00 -nn
26:00.0 VGA compatible controller [0300]: NVIDIA Corporation TU104 [GeForce RTX 2060] [10de:1e89] (rev a1)
26:00.1 Audio device [0403]: NVIDIA Corporation TU104 HD Audio Controller [10de:10f8] (rev a1)
26:00.2 USB controller [0c03]: NVIDIA Corporation TU104 USB 3.1 Host Controller [10de:1ad8] (rev a1)
26:00.3 Serial bus controller [0c80]: NVIDIA Corporation TU104 USB Type-C UCSI Controller [10de:1ad9] (rev a1)
From my understanding all four of the above devices must be passthrough to be sure the device is working correctly.
But first we need to inform vfio to claim those devices at boot. This is done by adding a few lines to /etc/modprobe.d/vfio.conf. We need those ID’s in brackets from the previous lspci output above.
# /etc/modeprobe.d/vfio.conf
#
# Add RTX2060 GPU to VFIO driver for passthrough
options vfio-pci ids=10de:1e89,10de:10f8,10de:1ad8,10de:1ad9
Add devices to guest
This is the XML code needed to passthrough a device to a virtual machine
<hostdev mode='subsystem' type='pci' managed='yes'>
  <source>
    <address domain='0x0000' bus='0x26' slot='0x00' function='0x0'/>
  </source>
  <rom bar='on'/>
</hostdev>
<hostdev mode='subsystem' type='pci' managed='yes'>
  <source>
    <address domain='0x0000' bus='0x26' slot='0x00' function='0x1'/>
  </source>
</hostdev>
<hostdev mode='subsystem' type='pci' managed='yes'>
  <source>
    <address domain='0x0000' bus='0x26' slot='0x00' function='0x2'/>
  </source>
</hostdev>
<hostdev mode='subsystem' type='pci' managed='yes'>
  <source>
    <address domain='0x0000' bus='0x26' slot='0x00' function='0x3'/>
  </source>
</hostdev>
Note that you need to change bus='0x26' and slot='0x00' to match your XX:YY code in your system, and you may ned to change the number of <hostdev> blocks you need. This code block will need to be inserted into the XML file, in the <devices> section. And then libvirt must be updated with the virsh define windows.xml command.
Disable VNC graphics
Now it’s time to disable the VNC, to do so just comment out these lines
<!--
<graphics type='vnc' port='-1' autoport='yes' listen='0.0.0.0'>
  <listen type='address' address='0.0.0.0'/>
</graphics>
<video>
  <model type='qxl' ram='65536' vram='65536' vgamem='16384' heads='1' prima>
  <address type='pci' domain='0x0000' bus='0x00' slot='0x01' function='0x0'>
</video> -->
This will disable the virtual graphics card and the VNC connection to this machine. I have had troubles using this when I passthrough a GPU.
Almost done
Because Nvidia don’t like consumers to use non server grade hardware for server stuff, that is passing through a gpu to a virtual machine you will need to hide the virtual machine from the guest OS else the Nvidia driver will fail with error code 43.
Add the following XML to the <features> node in the XML file
<hyperv>
  <vendor_id state='on' value='123456789ab'/>
</hyperv>
Another thing is that Windows (or Nvidia drivers?) requires you to have a monitor attached to the GPU for it to use hardware acceleration. You can use a HDMI dummy plug if you don’t want an extra monitor. I think it is possible to use the second input of your main monitor (I have not yet tried that). Currerntly I have a second monitor attached to my RTX2060.
USB Passthrough (for keyboard and Mouse)
If you have extra monitor, keyboard and mouse you can skip VNC and use the virtual machine as if it was any other machine. To passhtrough USB devices we need to identify them first.
Using lsusb to get the Bus and Device numbers
# lsusb
Bus 006 Device 002: ID 2109:0812 VIA Labs, Inc. VL812 Hub
Bus 006 Device 001: ID 1d6b:0003 Linux Foundation 3.0 root hub
Bus 005 Device 002: ID 2109:2812 VIA Labs, Inc. VL812 Hub
Bus 005 Device 005: ID 03f0:0024 HP, Inc KU-0316 Keyboard
Bus 005 Device 001: ID 1d6b:0002 Linux Foundation 2.0 root hub
Bus 002 Device 001: ID 1d6b:0003 Linux Foundation 3.0 root hub
Bus 001 Device 002: ID 046d:c051 Logitech, Inc. G3 (MX518) Optical Mouse
Bus 001 Device 001: ID 1d6b:0002 Linux Foundation 2.0 root hub
To pass through HP Keyboard (Bus 005 Device 005) and Logitech mouse (Bus 001 Device 002), we add this XML block to the XML file in the section
<hostdev mode='subsystem' type='usb'>
  <source>
    <address bus='5' device='5' /> <!-- HP Keyboard -->
  </source>
</hostdev>
<hostdev mode='subsystem' type='usb'>
  <source>
    <address bus='1' device='2' /> <!-- Logitech mouse -->
  </source>
</hostdev>
Notice that the bus and device attributes does not have any leading zeros, this is important, else libvirt will not interpret it correctly.
Just remember using bus & device tags is depending on the USB port you are attaching your devices to. If you want to be sure the HP keyboard attaches to the Windows machine regardless of USB port, there are other ways to attach it using the ID tag from lsusb. But using bus and device has worked better for me so I stick to that.
Install Nvidia drivers
So at last we can try to install Nvidia drivers, just start the virtual machine with the virsh start windows command. Either you connect to the virtual machine using VNC or if you went the monitor, keyboard & mouse route you can just use the machine as any other.